
The key came in the mail today. I got the right one. It comes with a spring (a thin bit of metal about 2.5 inches long). I'm pretty sure they (Yamaha) no longer make replacement keys so what you are going to find are probably taken from old DX7s that no longer work. It had minor ware, but whatever, it is a replacement key.
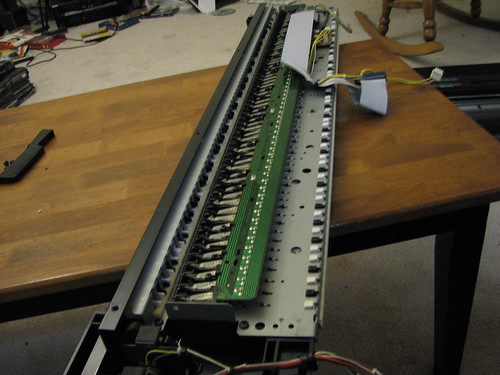
Look back at Part 1 for how to remove the keyboard assembly from the DX 7. You will have this:
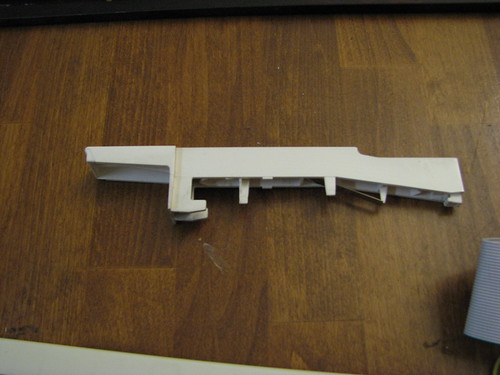
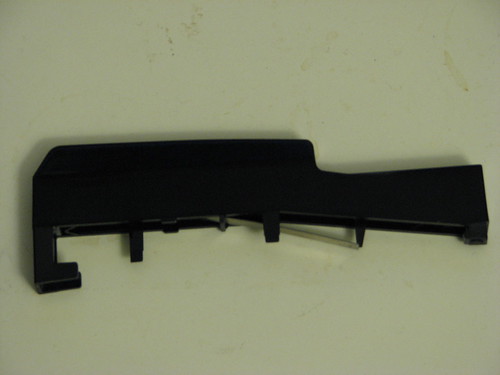
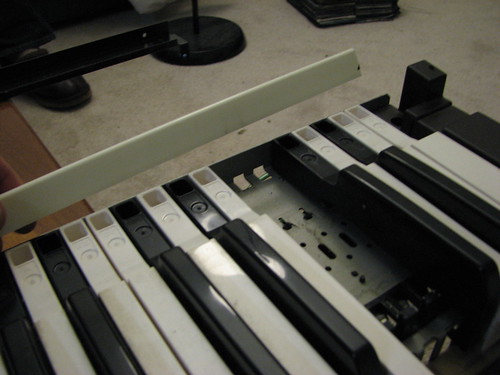
Turn the entire thing upside down (as seen above). There are two parts you will need to remove before you can take out the keys. You will see a black metal thing in front of all of the keys. It is connected with seven screws. Remove the screws, remove the metal thing (sone of the screw holes are shown below).
Flip the key assembly back over. You will see a long white plastic spacer. Lift it off of the metal rail that it sits on, nothing is holding it in palce. Those are the two parts.
You can now remove the keys! All you have to do is push the key back. This frees the key, then pull it forwars to actually remove it. The key is now free. To put the key back in slide the two horn looking bits on the bottom of the key into place on the key assembly, then align the spring with the the slot, push back, then down. To get access to the black key you will have to remove the two white keys next to it.
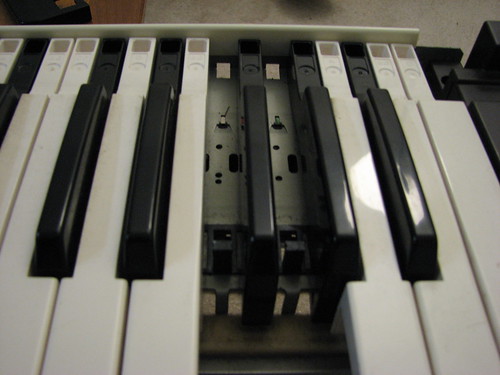
You can see the slot where the spring goes in the above picture; it is the hole to the right of the square hole.
When I took out the keys to get access to the black key I noticed that they were very dirty. Me, being me, decided to take out every key and clean them. When I put everything back together turned the keyboard on and played it I realized something went wrong. Some keys wouldn't produce a note, and some would produce one, then as you release the key it will make another note. I started marking what keys didn't work, only to find out that they all had somethign wrong with them.I will have to go back in and look at what I did wrong. My guess is that the keys are not sitting properly and making bad contact with the velocity sensors.
Also, remember that I am NOT responsible for any damage you might do to your DX7 by following these directions. As you can see, I might have messed mine up nicely. I suppose that Part 3 will be about making everything work again.
Hello,
ReplyDeleteI recently bought a DX5 at a pawn shop. Three of the keys were broken, and I got the replacements in today. The keys I replaced were the upper C#, G#, and A#.
After powering the synth back up, I found that from middle C, there is a repeating pattern of nonworking keys, almost as if the keyboard is set to behave so. The keys that do work are C, E, F#, G, A, A#, B, C, for the whole upper half of the keyboard.
Have you had any breakthroughs since your post, or any ideas on my situation?
No breakthroughs yet. I plan on working on this today or tomorrow.
ReplyDeleteI figured mine out. Make sure the two ribbons that connect to the keyboard are inserted fully. It is an awkward angle to plug something in, so I guess the first time I didn't get the one for the top half of the board secure. Every key works now.
ReplyDeleteHope this helps you.
Just a quick question. I've recently had to replace the mains wire on my DX7, en easy enough job. Having unsoldered the old one I realised I hadn't made a note of which way round the live and neutral go! Could you possibly 'pop the hood' once more and check which one is left and which one is right as you're facing the keyboard? The photos are frustratingly close to the bit I need to see but just not close enough.
ReplyDeleteThanks.
I know this is a REALLY old post, and certainly you've got your DX7 back together and working, or have long since given up, but the power supply board, looking from the FRONT of the keyboard, has the white neutral on the left pad, and the black hot on the right. Hopefully this will be helpful to someone else in the future..
DeleteHi Gary,
ReplyDeleteI'd be happy to take a look in my for you, but won't be able to get to it until this weekend.
George
I've repaired the DX7 keybed (it was rusty) and forgot where the felt strip comes. Since the felt disintegrated, I also have to find a new felt. Please answer:
ReplyDelete1. How many felt strips in total are there on the DX7 keyboard?
2. Where are they mounted? If you can make a picture, it would help. Or perhaps explanation using the pictures of yours already exposed here on your Web site.
Best regards,
Robert
lexonic@email.t-com.hr
www.lexonic.com
I think there was only one felt strip. I'll check sometime this weekend and post more pictures.
ReplyDeleteThanks for this. A friend gave up his Ghost of a DX7 to me; I was more interested in the cartridges that accompanied.. anyway a c# was not working. I have disassembled DX7's before, but not to repair a key. Lo and behold, the leaf spring came undone, and following your instruction (I never thought after removing the long while plastic strip off the back youi could coax keys in & out...), I was able to pop the key back in place. Thank you. Mike Tosc
ReplyDeleteHi,
ReplyDeleteThank you for sharing your experience.
It helps me a lot to disassembling my DX7 Mark1 keyboard.
I have inverted all the metal plates and clean contacts.
The beast work like never before.
Thanks
Believe it or not you just helped me out!! Thanks so much, I just had the low f# key do the same thing on mine.... these steps saved me an hour!
ReplyDeleteHallo, is it possible to have more details how to fix mount a key and how to fix the spring?
ReplyDeletethanks
George, Thanks so much for this information.. You surely saved me HOURS of springs and keys all over the basement floor, as I had been eyeing all the screws on the keyboard assembly wondering which ones I'd have to remove to fix a key! :-) I have an original DX7 that I bought in 1986 for about $1600 and it is to me what a Ford model T might be to a car collector, so when I had a house fire, and the "restoration specialists" DROPPED my DX while "saving" it from what was only light smoke damage before they got there, I was determined to fix it.. I bought another DX on ebay, with the intention of just moving my "E!" card to the newly bought one, but when I got into it, and realized just how few parts I'd have to replace, I decided to stay with my original, with just a few parts from the donor. Your site helped with the last of my getting it back together, and although I've now learned that there's something wrong with my cartridge slot, at least it's back playing again for the first time in 2 years!! (Yesterday was our 1 year anniversary of getting back into the house, but it takes time to get around to everything!!) Thanks and Happy Thanksgiving!!
ReplyDeleteWell, your posting is helping people even into the 2017. Just swapped out 3 black keys and it went great. Thanks for sharing with the community!
ReplyDeleteI come from even farther in the future! I just picked one up and a few of the keys seemed loose. So this was a very useful guide.
Delete